Adjusting Availability
Index
- Daily Availability: learn how to adjust day-to-day availability and take off special occasions like doctor’s appointments and parent-teacher meetings.
- Default Availability: learn how to adjust the default availability. This is what the availability will be set to every week without making any changes.
What To Know About Making Changes
We want everyone to get as much time off as they need. The trick to making that happen is good communication.
To make sure everyone gets the work they need, we need to know when availability changes as soon as possible.
The ideal time lead time for availability changes is at least two weeks.
Not following these rules can hurt our reputation with customers and makes it SUPER hard to keep our team’s schedule full.
Good communication is essential for making sure everything runs smoothly. Please, keep us in the loop!
*NOTE: Texting or calling to change availability isn’t a guarantee the changes will get logged. Everyone can adjust availability in the app and must take advantage of that.
Changing availability guidance summary:
- We want to know at least two weeks ahead of time
- Changes need to be submitted via the app.
Frequently not following these guidelines may result in less work or termination of the Tidy Casa contract.
How to Change Daily Availability
- First, log into the app at https://tidycasa.com/login/
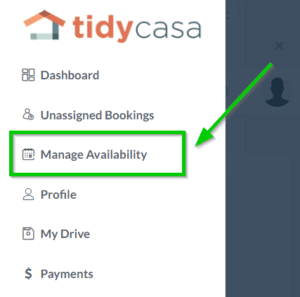
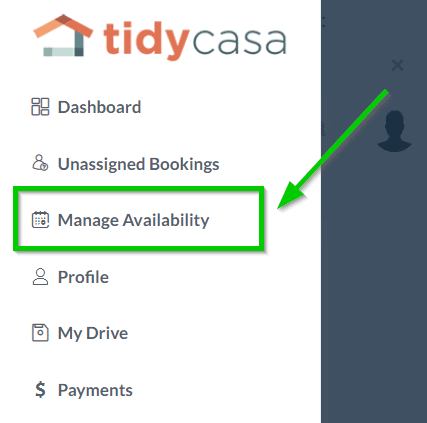
- From the dashboard, click on the menu icon in the upper left and select “Manage Availability” from the menu.
- From the Manage Availability page, click on the day of the week from the calendar you’d like to make changes to.
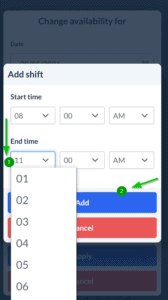
- Select the blue “Add Shift” button and adjust the Start and End time with the dropdowns.
- Click the blue Add button to set the new time. Click the “Add” button will close the shift pop-up.
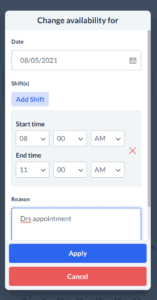
- Next, enter a reason for making the change.
- Finally, click the blue “Apply” button to save the changes.
- A green confirmation box will show to acknowledge the changes.
How to Change Default Availability
- First, log into the app at https://tidycasa.com/login/
- From the dashboard, click on the menu icon in the upper left and select “Manage Availability” from the menu.
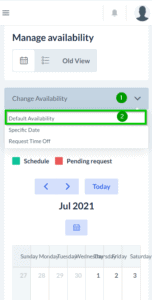
- From there, select the drop-down menu and click Default Availability.
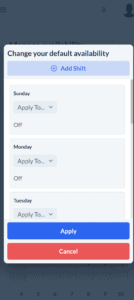
- This will bring up a pop-up to edit the default availability. Select the blue “Add Shift” button at the top of the pop-up.
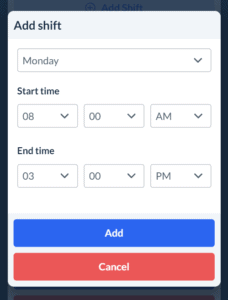
- From there, fill out the desired shift and click “Add.”
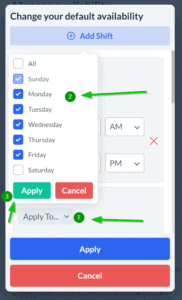
- Select one of the “Apply To…” buttons. This will bring up a second pop-up where you’ll be able to select all the days of the week to apply the schedule after you’ve chosen the desired days. Click the green “Apply Button.” Then, the blue Apply Button to finalize the change.
- Once the default availability has been updated, a green confirmation box will appear to confirm.

